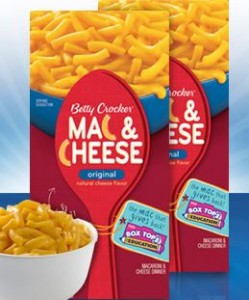
I know what you're thinking: "Awesome! She's tried a new homemade recipe for this classic!" or, "Sweet! She's going to share a tried-and-true recipe for this classic!"
Nope.
This may disappoint some, but there are meals where you just don't feel like cooking. For me, there are whole days! Don't feel guilty - I never do! That just means you need to whip out...
Yes. The boxed kind. Haha. This is my blog! I can do what I want!
I have always been a boxed Mac 'n Cheese lover, and I'm kinda picky. I've always loved Kraft, but it's kinda expensive! Over the years, I've tried all sorts of off-brands and on-brands and whatever-brands and I stuck with Kraft because all the other boxed kinds still had an almost powdery texture when all was said and done.
Until I tried the Betty Crocker version. Guys, this stuff is seriously tasty, and I believe it's better than the Kraft. When I first tried this brand, it was even better because you only had to dirty the sauce pan you made it in - no draining! They have since made the preparation more like the Kraft version, which really is a shame, but it still tastes good.
And the best parts? 1. It's super-easy for those days where chopping/cooking/baking/sauteing anything just sounds awful. 2. It's a lot cheaper than the Kraft brand. Last time I bought it, it was 88¢. 3. I have two little boys, and at least one of them will eat it! Hey! That is success in my book.
(And now you're wondering what little kid doesn't like mac 'n cheese. I have no idea how my love of mac 'n cheese didn't get passed on, but it didn't.*shrug*)
So next time you don't want to make anything energy consuming/you have to feed a picky kid/you need to save some money, grab the Betty Crocker Mac 'n Cheese. You'll see what I'm talking about!
Showing posts with label Food. Show all posts
Wednesday, December 4, 2013
Monday, November 11, 2013
Creamy Linguine with Zucchini
Hehehe, I love how that rhymes...
Anyway, I made this yesterday for dinner. I really liked it! I'm not sure my husband was a huge fan, but I liked it, and my kids both liked it, so it's going to be made again, for sure.
| I did NOT take this picture. Lol. I am not that amazing. |
As a side note, I used minced garlic since I already had it on hand, and I thought it tasted just fine. Also, I put in more than a half cup of Alfredo sauce because I used up what was left in a bottle I already had, and I liked how it turned out. The only thing I would do differently next time is to add a little more salt. I didn't measure it out, and so I probably just didn't add enough initially. Anyway, I hope you enjoy it as much as I did! I mean, my younger son even asked for the leftovers for lunch today. Can it get much better than that? I think not!
Servings: 6
Prep Time: 15 minutes
1 lb linguine
2 tbs extra-virgin olive oil
3 cloves garlic, peeled and thinly sliced
2 lbs coarsely shredded zucchini
1/2 tsp salt
1/8 tsp black pepper
1 cup shredded sharp cheddar cheese (4 oz)
1/2 cup bottled Alfredo sauce
Fresh basil, for garnish (optional)
1. Cook pasta following package directions. Drain; keep warm. In large skillet, heat oil over medium-high heat. Add garlic; cook, stirring, about 30 seconds or until lightly browned.
2. Increase heat to high. Stir in zucchini, salt and pepper. Cook, stirring often, about 3 minutes or until tender. Add cheese and Alfredo sauce; heat through. Transfer to large bowl; toss with pasta. If desired, garnish with basil.
Yum yummm! Eat up, my friends!
Tuesday, November 5, 2013
Christmas Crack
I have a confession to make: I am not a creative cook. I cannot, for the life of me, look in my pantry and fridge, see some ingredients, and figure out how to make something new out of it all. I can follow a recipe pretty well, though, so pretty much every food (and by "pretty much every food" I really mean "every food") I post will be a recipe I've found somewhere else and wanted to share.
Then I put the brown sugar and butter in a saucepan and let them simmer for a little bit. As a side note, make sure that if you use a spatula, you use one that's made for hot temperatures... I ended up melting the tip of mine a little bit! Evidence #1 of my amazing cooking prowess!
When it was all nice and thick, I poured it on top of the crackers. Another tip: don't pour it all in the middle, like I did. It will push the crackers around and it makes it a lot more difficult to spread around. Evidence of my cooking prowess #2! And this is for an easy recipe! Haha! Then I baked it in the oven until it was all bubbly and yummy.
And now I'm ashamed to say that I don't have any other pictures, except for the ending product. After baking the crackers and the brown sugar/butter mixture and letting it sit a few minutes, you top it with chocolate chips. The original blog said to use semi-sweet chocolate chips, but I used milk chocolate because I like milk chocolate better. After the chocolate chips began to melt, I spread the chocolate all over the crackers. Then I let it cool and harden.
Ok, I'm kidding. I put it in the fridge to hurry it up! I wanted some in my belly!
Phew! I feel so much better! Who else out there is with me on the non-creative cookery? I cannot be alone!
Anyway, I love Pinterest. It has provided me with many a recipe, especially desserts and treats. I wanted to share one with you. This is so simple and easy, which is part of the reason I liked it so much. It only has four ingredients, and you can't go wrong with that!
It's called Christmas Crack. (Although the original blogger called it Terribly Terrific Toffee...) I think it was renamed on Pinterest because, dude... this stuff is as addictive as the drug. I couldn't stop eating it! I had to hide it in my pantry so that my boys and I would stop thinking about it and grabbing a piece every time we passed it. Seriously.
First, I lined up all the crackers on a smaller cookie sheet. It calls for 40 saltines, but I halved a couple to make it extend all the way to the end of the baking sheet.
| Gotta love the iPhone pictures... Notice the half-crackers on the right side. |
When it was all nice and thick, I poured it on top of the crackers. Another tip: don't pour it all in the middle, like I did. It will push the crackers around and it makes it a lot more difficult to spread around. Evidence of my cooking prowess #2! And this is for an easy recipe! Haha! Then I baked it in the oven until it was all bubbly and yummy.
And now I'm ashamed to say that I don't have any other pictures, except for the ending product. After baking the crackers and the brown sugar/butter mixture and letting it sit a few minutes, you top it with chocolate chips. The original blog said to use semi-sweet chocolate chips, but I used milk chocolate because I like milk chocolate better. After the chocolate chips began to melt, I spread the chocolate all over the crackers. Then I let it cool and harden.
Ok, I'm kidding. I put it in the fridge to hurry it up! I wanted some in my belly!
Not the best pictures, and they don't do the deliciousness justice, but honestly. Just give it a try. You'll thank me later!
Christmas Crack Recipe, as taken from the blog A Southern Grace
1 cup unsalted butter (no margarine allowed)
1 cup brown sugar, packed tightly
2 cups semi-sweet chocolate chips (or milk chocolate...)
40 saltine crackers
Preheat oven to 350ºF. Line a 15x10-inch jelly roll pan or a 12x17-inch cookie sheet with foil and spray with non-stick spray. Lay a flat layer of crackers out on the foil. Melt the sugar and butter until a boil is reached. Reduce the heat and simmer, uncovered, for 5-6 minutes or until mixture is thickened and sugar is completely dissolved. Pour this mixture over the crackers and spread to coat evenly. Bake for 8-10 minutes, or until the toffee becomes bubbly. After removing the pan from the oven, let it sit for 3-5 minutes. Sprinkle on the chocolate chips, let them soften and melt, and then spread them into an even layer. (You can add nuts, cracker crumbs, or whatever else floats your boat at this point.) Let cool and, if desired for expediting purposes, refrigerate until hardened. Break into pieces the size of your choice. I personally prefer a hand-sized chunk.
Thursday, October 31, 2013
You Guys Have To Try This BBQ Sauce!
Ok, a couple things. 1. I am not a great photographer, and you'll just have to deal with my iPhone pictures. Haha! 2. I know it's awful, but I'm not a huge fan of BBQ sauce.
"WHAT?" I know you're saying. "How could you not like BBQ sauce?" I don't know, guys! I just don't.
Well, I found one that I love. Yes, I love it. Weird. But great!
Here it is:
Wow, guys. This stuff is good! I made pulled pork a few days ago (I'll have to talk about that in another post eventually), and this sauce tasted so good with it! I'm sure that it tastes good with a variety of meats, and I'm excited to have some again. I got my bottle at Giant Eagle, but you can buy it online as well. If you want to learn more about the makers of this BBQ sauce or see their products, click HERE.
Just thought I'd recommend! It is super-tasty.
"WHAT?" I know you're saying. "How could you not like BBQ sauce?" I don't know, guys! I just don't.
Well, I found one that I love. Yes, I love it. Weird. But great!
Here it is:
| Stubb's Honey Pecan |
Wow, guys. This stuff is good! I made pulled pork a few days ago (I'll have to talk about that in another post eventually), and this sauce tasted so good with it! I'm sure that it tastes good with a variety of meats, and I'm excited to have some again. I got my bottle at Giant Eagle, but you can buy it online as well. If you want to learn more about the makers of this BBQ sauce or see their products, click HERE.
Just thought I'd recommend! It is super-tasty.
Subscribe to:
Posts (Atom)